
Let’s dive into integrating the Next Auth Credentials Provider with JWT, leveraging TypeScript support for a Next.js 14 example. 🚀 We’ll explore NextAuth.js JWT, Next-Auth Secrets, and Next Auth credentials provider – and more! Ready to explore these aspects and beyond? Let’s kick things off with a fundamental introduction to Next.js and Next-Auth.js.
Table of Contents
Next.js, a go-to framework for modern web applications, often relies on robust authentication solutions like Next-Auth.js. This article guides you through incorporating Next-Auth.js with TypeScript and Credential providers.
Our focus narrows down to understanding Next.js authentication using Next-Auth.js, a versatile package extending support to frameworks like Svelte Kit and Vue.js. With built-in support for numerous Auth Providers, a simple Getting Started with Next-Auth can guide you through implementing a basic authentication system in your Next.js project.
This tutorial aims to simplify Next.js authentication, by demonstrating the use of the Next-Auth framework with Credential providers. Ready to explore Next.js authentication in an easy and straightforward manner? Let’s get started! 🚀
Create Next.js 14 Project with TypeScript Support
Since our main focus in this project is TypeScript, let’s dive into adding TypeScript support to our Next.js project. 🚀 The official Next.js documentation has a helpful page that guides us through the process. With the magic of the official create-next-app command, the whole thing becomes a piece of cake.
Just open up your Command Prompt and head to your project directory – mine’s `C:\Users\super\nextjs-projects\`. Now, let’s fire up the command! 🔧
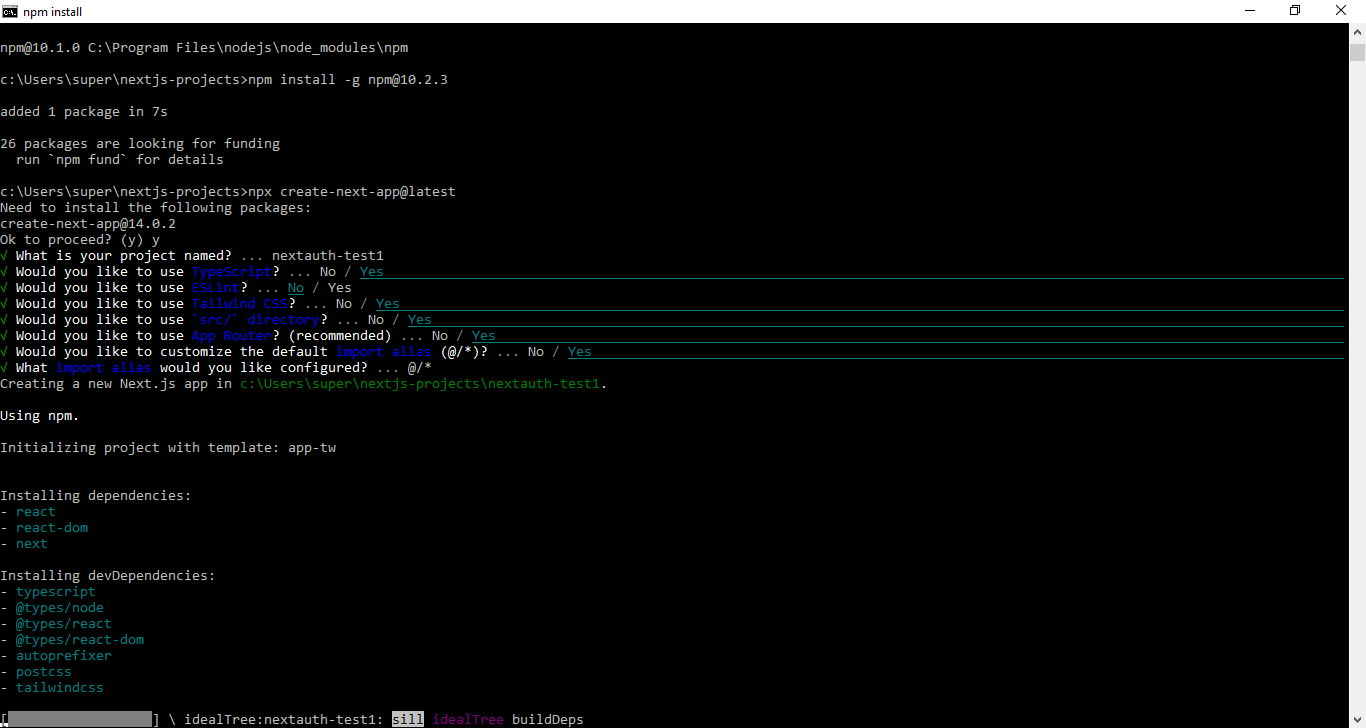
npx create-next-app nextauth-test1 --tsCode language: Bash (bash)You can let Next.js know that you want TypeScript support by adding the –ts flag when creating your project. Or you can use the official command to create the next.js 14 project with the npx create-next-app@latest and then follow the provided instructions and saying “yes” to adding TypeScript in the next.js project. Here is the screenshot of how it would look.
Now if you want to run the application, all you have to do is to hit the command
npm run dev
Code language: Bash (bash)
Because we instructed the startup setup to make src/app folders, so now our source code is under these directories. If we navigate to them, we will find following files 📂. Under the src folder, there is app folder. Inside that folder there is page.tsx which is the actual home page of the default app. There is another layout.tsx file which is the main layout for the page.tsx file. Because we are using the tailwind CSS Support with typescript in next.js 14 app, so we are importing the tailwind css utilities are imported in global.css file. Which is later imported into the layout.tsx file.
What is NextAuth.js?
NextAuth is a popular authentication library for Next.js applications. It provides a variety of features, including:
- Support for multiple authentication providers, such as email, social, and credential providers
- The ability to use JWT (JSON Web Token) as a token format to store and transmit user information securely.
- The ability to work with any OAuth service, any database, and any serverless environment.
This feature makes it best suited for variety of applications.
Install Next-Auth in Next.js Project
Now we need to add the support of Next-auth js framework into our project. There is an official Getting Started Guide for this which you can check for more information. For that you need to navigate to the nextauth-test1 directory and type the following npm install command
yarn add next-auth
# or
npm install next-auth
# or
pnpm add next-authCode language: Bash (bash)
After that, the next-auth library is added to your project.
Prepare Auth UI for Next.js Authentication
Now before we jump into the actual Next-Auth.js based authentication, we need to prepare some ui components. In the new Next.js 14 or Next.js 13 based routes you can create a new component directory in the src folder. Inside that folder we will create our UI Components which we may need to apply into the final application. These components are required in our UI pages which are Login Page, Restricted page, Dashboard Page and Logout Page.
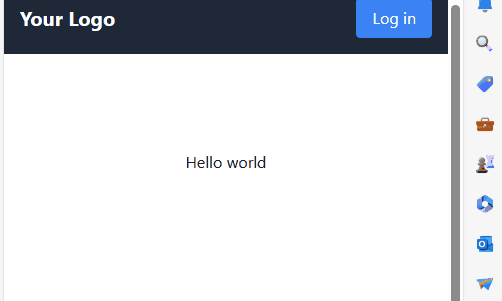
Create Responsive Navbar Component in Next.js
Let’s start with the Navbar Component. We will implement this with the top navigation bar. Because we already started our page with the tailwind css support, we can easily style our component with TailwindCSS. Here is how the component is structured.
// components/Navbar.tsx
'use client';
import Link from 'next/link';
import React from 'react';


const Navbar: React.FC = () => {

  const [session, setSession] = React.useState(false);

  return (
    <nav className="bg-gray-800 p-4">
      <div className="container mx-auto flex justify-between items-center">
        <Link href="/"
          className="text-white text-xl font-bold">Your Logo

        </Link>

        <div>
          {!session ? (
            <button
              className="bg-blue-500 hover:bg-blue-700 text-white py-2 px-4 rounded"
              onClick={() => setSession(true)}
            >
              Log in
            </button>
          ) : (
            <button
              className="bg-red-500 hover:bg-red-700 text-white py-2 px-4 rounded"
              onClick={() => setSession(false)}
            >
              Log out
            </button>
          )}
        </div>
      </div>
    </nav>
  );
};

export default Navbar;

Code language: TypeScript (typescript)
This is basic UI which implements Login and Logout button 🔳 with top 🔝 Navbar. Which toggles session states with true and false at onClick events. The 'use client'; tell that, this would be rendered on client side. If you do not mention this on top of your component, it would prompt you error to use ‘use client’; on top of your page from Next.js 13 and Next.js 14 based components which use React Hooks. We are using useState hook. Which could only be used with client side rendering.
Create Custom Login Page
Althoug the Next-Auth.js library provides built in Authentication system and built in Sign In Page. But we are focusing on using a custom Sing in page. So we are going to create a new page folder 📂 inside our main src/app folder. We will name this folder login which enables \login route. This is new routing in Next.js 14. Inside this login folder, you need to create a new page.tsx file. The rest is pretty simple and clear. All you have to do is to create a page with proper tailwind css based styling. Here is my pretty straight forward login page which I am going to use in this tutorial.
const Login: React.FC = () => {
  return (
    <div className="flex items-center justify-center min-w-full">
      <div className="w-full max-w-md p-4 bg-white rounded shadow-md">
        <h1 className="text-2xl font-semibold mb-4">Login</h1>
        <form>
          <label className="block mb-2">Email:</label>
          <input
            type="email"
            name="email"
            className="w-full p-2 border rounded mb-4"
            placeholder="Your email"
          />

          <label className="block mb-2">Password:</label>
          <input
            type="password"
            name="password"
            className="w-full p-2 border rounded mb-4"
            placeholder="Your password"
          />

          <button
            type="button"

            className="w-full bg-blue-500 text-white p-2 rounded"
          >
            Log in
          </button>
        </form>
      </div>
    </div>
  );
};

export default Login;
Code language: JavaScript (javascript)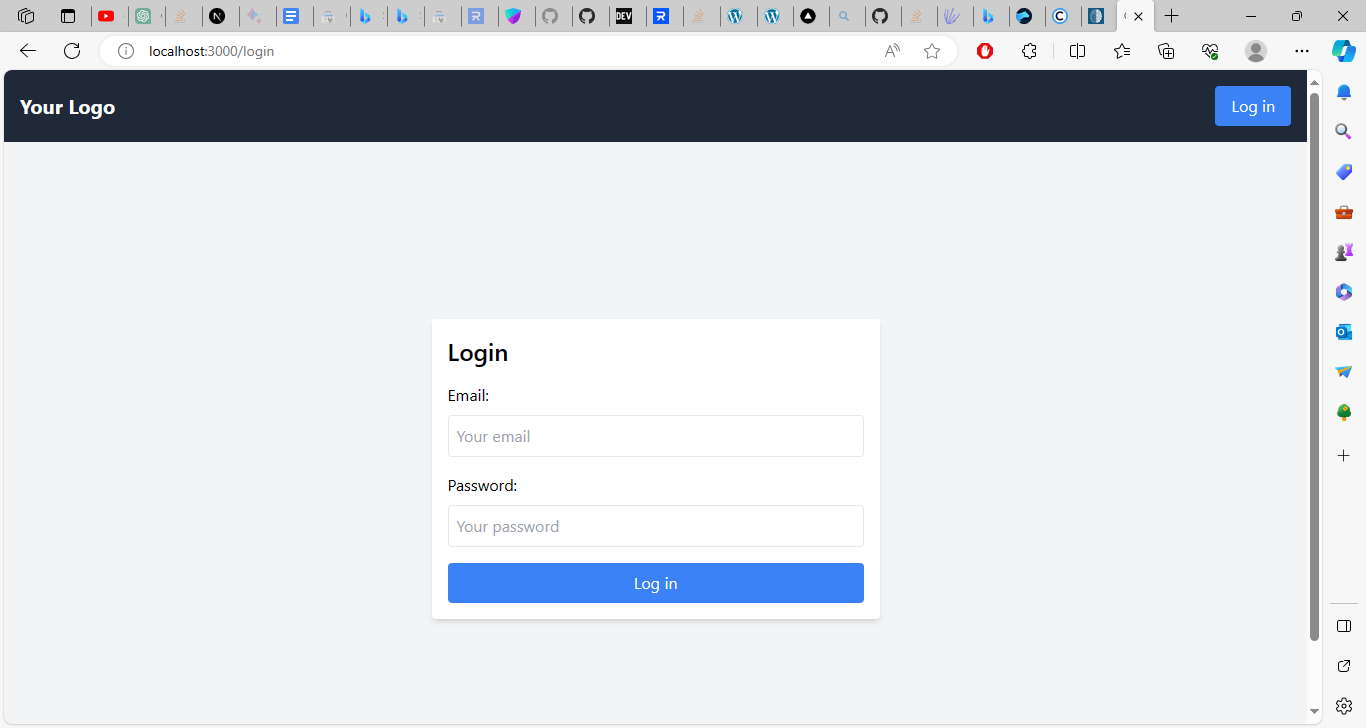
Dashboard Page
Now we are going to create a dashboard page. Which will be displayed when the user is logged in. If the user is not logged in, it will be redirected back to the login page. So here is the dashboard page which we created by created a new folder inside our app directory and inside this dashboard folder we created new page.tsx file. Here is how it looks.
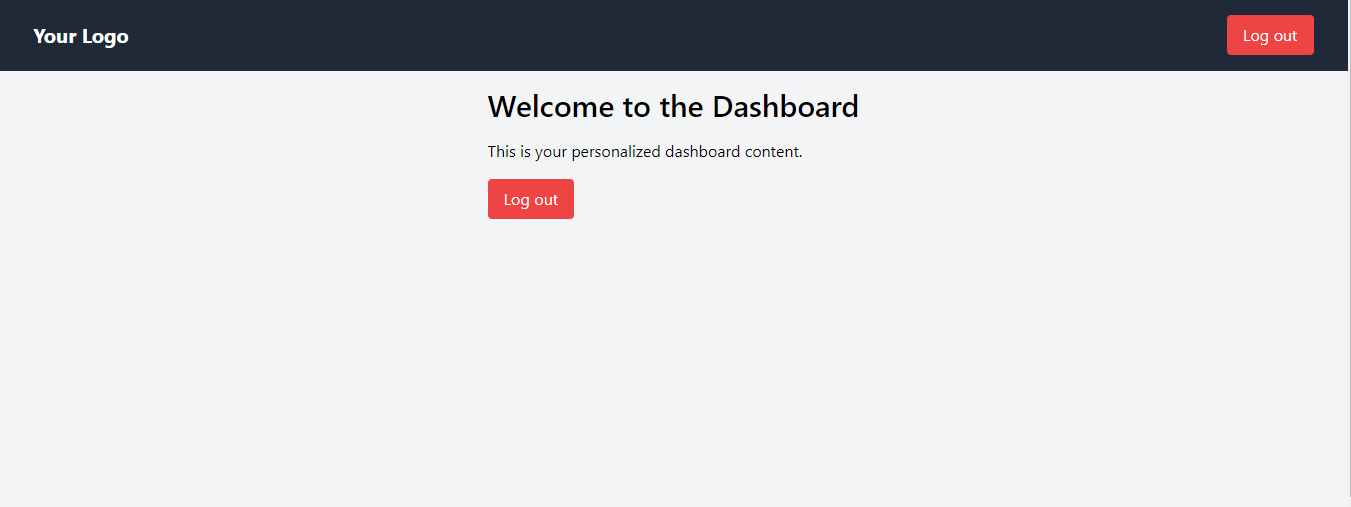
Here is the code to create this dashboard page styled with tailwind css.
const Dashboard: React.FC = () => {


    return (
        <div className="min-h-screen bg-gray-100">
            <div className="container mx-auto p-4">
                <h1 className="text-3xl font-semibold mb-4">Welcome to the Dashboard</h1>
                <p className="mb-4">This is your personalized dashboard content.</p>
                <button
                    className="bg-red-500 hover:bg-red-700 text-white py-2 px-4 rounded"

                >
                    Log out
                </button>
            </div>
        </div>
    );
};

export default Dashboard;

Code language: TypeScript (typescript)
CredentialsProvider Next Auth TypeScript
Now it is time to add CredentialsProvider of NextAuth.js with TypeScript support into our Next.js project. Because this is Next auth credentials example with typescript we are going to create the […nextauth].tsx file. To make nextauth credentials works with typescript, we need to change the provider settings and must add CredentialsProvider from next-auth/Providers in our typescript file.
Now open your project in Visual Studio Code, or one of your favorite IDE, and navigate to our recently created next auth typescript example project directory. Create a new api directory and under this directory create a new folder called the auth. Under this directory Create […nextauth].tsx file. This file would be responsible for handling all of the nextauth api routes, like sign in and Sign Out functions. Copy the following code into this file
import NextAuth from "next-auth"
import CredentialsProvider from "next-auth/providers/credentials";

export default NextAuth({

    providers: [
        CredentialsProvider({
            // The name to display on the sign in form (e.g. "Sign in with...")
            name: "Credentials",
            // The credentials is used to generate a suitable form on the sign in page.
            // You can specify whatever fields you are expecting to be submitted.
            // e.g. domain, username, password, 2FA token, etc.
            // You can pass any HTML attribute to the <input> tag through the object.
            credentials: {
              username: { label: "Username", type: "text", placeholder: "jsmith" },
              password: {  label: "Password", type: "password" }
            },
            async authorize(credentials, req) {
              // Add logic here to look up the user from the credentials supplied
              const user = { id: 1, name: "J Smith", email: "jsmith@example.com" }
              if(credentials?.username=="test@gmail.com" && credentials?.password=="hello123"){
                return user
              }else{
                return null;
              }
            }
          })
  ],
  callbacks: {
    session({ session, token, user }) {
      return session // The return type will match the one returned in `useSession()`
    },
  },
})
Code language: TypeScript (typescript)
After this file added, you are good to use the login system with your Next js project.
If you’re working with a version of Next.js older than 13 or 14, you might need to make adjustments to the _app.tsx file. This ensures the ability to utilize the session variable across all pages or the entire project. Below is the code snippet you need to integrate, ensuring your app is informed about where to retrieve the session information 🚀.
import { SessionProvider } from "next-auth/react"
import type { AppProps } from "next/app"

// Use the <SessionProvider> to improve performance and allow components that call
// `useSession()` anywhere in your application to access the `session` object.
export default function MyApp({ Component, pageProps }: AppProps) {
  return (
    <SessionProvider
      // Provider options are not required but can be useful in situations where
      // you have a short session maxAge time. Shown here with default values.
      session={pageProps.session}
    >
      <Component {...pageProps} />
    </SessionProvider>
  )
}
Code language: TypeScript (typescript)
Using the Next.js authentication
Now it’s time to use the authentication system. Let’s create a components folder at the root of your project and create following LoginButton components into this folder copy the following code which is taken from the official documentation of the Next-Auth Getting Started guide Page.
import { useSession, signIn, signOut } from "next-auth/react"

export default function LoginButton() {
  const { data: session } = useSession()
  if (session) {
    return (
      <>
        Signed in as {session?.user?.email} <br />
        <button onClick={() => signOut()}>Sign out</button>
      </>
    )
  }
  return (
    <>
      Not signed in <br />
      <button onClick={() => signIn()}>Sign in</button>
    </>
  )
}
Code language: TypeScript (typescript)
save this file as your desired name or in my case login-btn.tsx, this will automatically handle the signIn and signOut states. You can add this into your Layout like following
import React, { ReactNode } from "react";
import Header from "./Header";
import Footer from "./Footer";
import LoginButton from "./login-btn";
import styles from "../styles/Home.module.css"


interface LayoutProps {
  children: React.ReactNode
}

export default function Layout({ children }: LayoutProps) {
  return (
    <>
      <Header />
      <LoginButton/>
      <main className={styles.main}>{children}</main>
      <Footer />
    </>
  )
}
Code language: TypeScript (typescript)
That’s all for now, you are good to use the Next-auth system. If you are interested into the lay outing system we used into this project you may want to check my other tutorial about using Layouts in Next js project. Or if you want to use some back-end database with the Credential provider stay tuned for the upcoming article on this.
